Video editing may seem like a complicated task, especially if you’re new to the world of audiovisual production. However, with Adobe Premiere Pro, you can create impactful videos quickly and easily. In this article, I will show you how to perform basic edits that will elevate the quality of your projects without wasting much time.
1. Set Up Your Project Efficiently
Before you start editing, it’s crucial to set up your project correctly. This will not only streamline the process but also help you stay organized.
Steps to Set Up Your Project:
- Open Premiere Pro and select “New Project.”
- Name your project and choose an appropriate location to save it.
- Configure the sequence settings according to your video specifications (e.g., resolution and frames per second).
A good initial setup will save you from problems later on.
2. Import Your Media
Once you have set up your project, the next step is to import the media you will use. This includes videos, images, and music.
How to Import Media:
- Right-click in the “Project” window and select “Import.”
- Navigate to the location of your files and select them.
- Click “Open” to add them to your project.
Organize your files into folders within Premiere for easy access during editing.
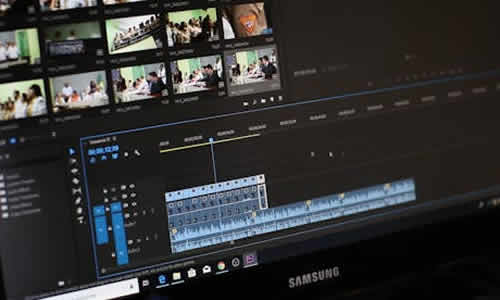
3. Create Your Timeline
With your media imported, it’s now time to create your timeline. This is the foundation of your project, where you will assemble all the elements.
Steps to Create a Timeline:
- Drag the video clips from the “Project” window to the timeline.
- Arrange the clips in the order you want them to appear.
- Use the razor tool (C key) to split clips and eliminate unwanted parts.
Remember that the timeline is your main workspace. Keep everything organized for a smoother editing process.
4. Add Transitions and Effects
To make your videos more appealing, you can add transitions and effects. This will not only make your cuts smoother but also give a professional touch to your work.
How to Add Transitions:
- Go to the “Effects” tab and search for “Video Transitions.”
- Drag the desired transition between two clips on the timeline.
Adding Effects:
- In the same “Effects” tab, look for the effect you want to apply.
- Drag it onto the clip in the timeline and adjust its parameters in the “Effect Controls” tab.
5. Export Your Video
Once you are satisfied with your edit, it’s time to export your video. Make sure to choose the appropriate settings for your video to display well on the platform where you will publish it.
Steps to Export:
- Go to “File” > “Export” > “Media.”
- Select the appropriate format (H.264 is a good option for most platforms).
- Click “Export” and wait for Premiere to complete the process.
With these simple steps, you can create impactful videos in no time using Adobe Premiere Pro. The key lies in organization, creativity, and making the most of the tools the software offers. As you practice, you will become more efficient and be able to experiment with more advanced techniques.